Step 1: MAP Account Creation
In order to utilize the capabilities provided by MAP you must first sign up for a MAP account. To create your MAP account:
- Navigate to map.idigi.com and click the Sign Up button
 (highlighted in red below): (highlighted in red below):

- You will be redirected to the MAP signup app which will display the MAP registration form by default (as shown below). Fill in the required fields of the registration form and then click the Sign Up button (highlighted in red below).

- After submitting your account information the signup app will create a MAP organization and add your user account to that organization, making you the administrator for that organization's account.
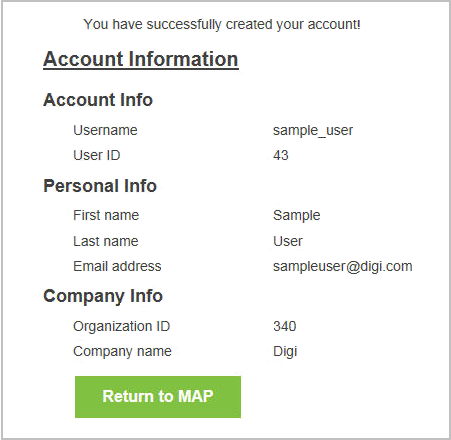
- Once your account has been created the account confirmation page will be displayed (as shown below). During the registration process a numerical user ID will be created and assigned to your account (43 in the example below). A numerical organization ID will also be created and assigned to your newly created organization (340 in the example below).
Take note of these numbers as they will be used in subsequent steps within this guide.
Note: Clicking the Return to MAP button will take you back to the MAP Home page (as displayed in Step 1).
With your newly created MAP account you're ready to proceed to Step 2 where you'll configure the mobile asset device to communicate with MAP.
Back to the Introduction | Move to Step 2
|